

How to Fix Minor Water Leaks: A DIY Guide
Table of Contents
- Identifying the Source of Your Water Leak
- How to Shut Off Main Water Supply
- Essential Plumbing Tools for Homeowners
- Step-by-Step Repair Methods for Minor Water Leaks
- When to Call a Professional Plumber
- Post-Repair Testing and Water Damage Prevention
- Common Mistakes to Avoid
- Frequently Asked Questions
Last Updated: September 25, 2026
Identifying the Source of Your Water Leak
Finding where a leak starts is the first step toward learning how to fix minor water leaks. Water can travel along pipes, inside walls, or beneath flooring before you notice it.
Look for these signs of a leak:
- Wet spots on walls, ceilings, or floors
- Discoloration or staining on surfaces
- Soft or spongy drywall
- Mold or mildew growth
- A musty smell in closed spaces
- Higher than normal water bills
Check your water meter. Turn off all water-using appliances and fixtures for 30 minutes. If the meter reading changes, you have an active leak somewhere in your system.
How to Shut Off Main Water Supply
Shut off water before attempting any repair. The main water shut-off valve controls all water entering your home and is usually located near the water meter or where the main water line enters the house.
Look for the shut-off valve in these common locations:
- Basement or crawlspace
- Garage
- Under the kitchen sink
- Outside near the foundation
- In a utility room or mechanical closet
If your main shut-off valve is stuck or won’t turn, do not force it. Applying too much pressure can damage the valve. Call a professional plumber instead. A broken shut-off valve during an emergency can flood your entire home.
Essential Plumbing Tools for Homeowners
A few basic tools handle most common repairs to fix minor water leaks.
Tools to keep on hand:
- Adjustable wrench (for tightening compression fittings)
- Pipe cutter (for cutting damaged sections)
- Pliers (slip-joint or tongue-and-groove)
- Screwdrivers (flathead and Phillips)
- Flashlight (to see under sinks and behind walls)
- Bucket or drip tray (to catch water)
- Dry cloth or towels (for drying pipe surfaces)
- Thread seal tape (for sealing pipe threads)
Temporary vs. Permanent Repairs
Temporary fixes buy time while you arrange a permanent solution. They’re useful for minor drips, small pinhole leaks, or when a professional plumber isn’t immediately available.
Temporary patches work for:
- Small cracks in PVC or metal pipes
- Pinhole leaks in copper pipes
- Slow drips that don’t require immediate shutdown
Permanent repairs are needed for:
- Large cracks or splits
- Leaks at pipe joints
- Corroded sections of pipe
- Recurring leaks in the same spot
Step-by-Step Repair Methods for Minor Water Leaks
Identifying Your Pipe Material
Copper pipes are reddish-brown, durable, but prone to pinhole leaks. PVC pipes are white or gray plastic, rigid, and used for drain lines and cold-water supply. PEX tubing is flexible, color-coded (red for hot, blue for cold), and less prone to corrosion. Galvanized steel pipes are silver-gray, found in older homes, and corrode from the inside out.
Repairing Copper Pipes
Copper responds well to epoxy putty and rubber patches for pinhole leaks. For larger cracks, use a slip coupling to cut out the damaged section and solder in new copper.
For pinhole leaks in copper:
- Shut off water at the main valve
- Dry the pipe completely with a cloth (moisture prevents epoxy adhesion)
- Lightly sand the area around the leak with fine-grit sandpaper
- Knead epoxy putty until uniform in color
- Press firmly over the hole, smoothing with a wet finger
- Allow 24 hours cure time before restoring water pressure
- Monitor for 24 hours; epoxy putty can weep if the pipe surface wasn’t fully dry
For larger cracks in copper:
Repairing PVC Pipes
PVC is rigid and doesn’t flex, so clamps alone may not seal effectively. PVC cement or a slip coupling repair is more durable.
For small cracks in PVC:
- Shut off water
- Dry the pipe thoroughly
- Clean the area with PVC primer (this softens the surface slightly)
- Apply PVC cement to both the pipe and a PVC patch coupling
- Press the patch coupling over the crack and hold for 30 seconds
- Allow 2 hours cure time before pressurizing
For splits or large cracks:
Repairing PEX Tubing
PEX is flexible and forgiving. Most leaks occur at compression fittings rather than in the tubing itself.
For leaks at PEX fittings:
- Shut off water
- Use an adjustable wrench to tighten the compression nut one-quarter turn clockwise
- Restore water and observe for 10 minutes
- If still leaking, turn another quarter-turn (do not overtighten; PEX fittings are plastic and can crack)
For punctures or small splits in PEX tubing:
Sealing Faucet and Joint Leaks
Leaks at faucet bases or pipe joints often come from loose compression fittings. For persistent issues with faucets, DeWolfe’s Affordable Plumbing offers Faucet Repair or Replacement services.
To tighten a compression fitting:
- Place a drip tray under the leak
- Use an adjustable wrench to grip the fitting nut
- Turn clockwise one-quarter turn
- Check if water still drips
- Repeat in quarter-turn increments until the leak stops
Using Epoxy Putty for Small Pipe Leaks
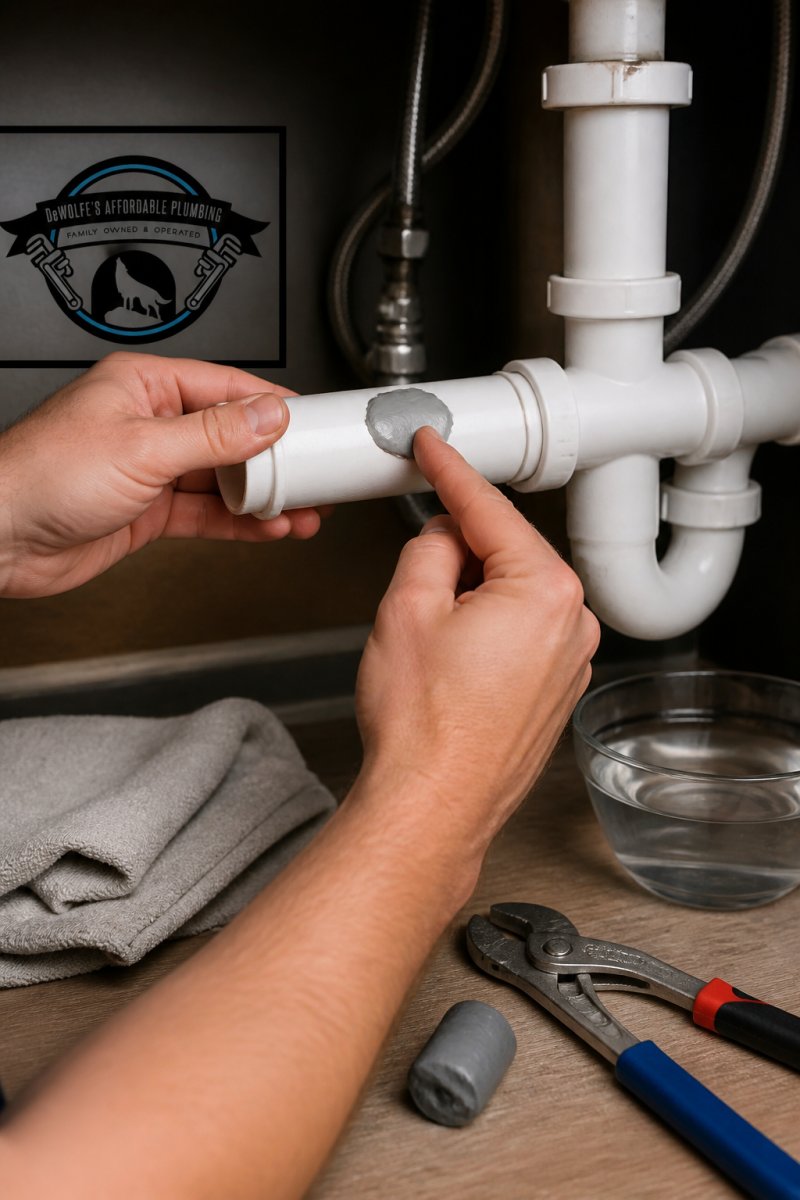
Epoxy putty works well for pinhole leaks and small cracks in metal or PVC pipes. It’s inexpensive, requires no special tools, and sets quickly.
Steps to apply epoxy putty:
- Shut off the main water supply or the fixture valve
- Dry the pipe completely with a cloth
- Roughen the pipe surface lightly with sandpaper (helps putty stick)
- Knead the epoxy putty in your hands until it’s uniform in color
- Press the putty firmly over the leak, covering the entire crack
- Smooth it with a wet finger or tool
- Allow it to cure per the product instructions (usually 24 hours)
- Turn water back on and monitor for leaks
Applying Rubber Patches and Pipe Clamps
A rubber patch and pipe clamp combination handles larger cracks and splits. This method works on any pipe material and creates a water-tight seal.
How to install a rubber patch and clamp:
- Turn off water at the main shut-off valve
- Dry the damaged section thoroughly
- Wrap the rubber patch around the leak, centering it over the crack
- Position the pipe clamp over the rubber patch
- Tighten the clamp bolts evenly, alternating sides
- Tighten until water stops dripping, then add one more quarter-turn
- Check for leaks after 10 minutes
When to Call a Professional Plumber
Some leaks are beyond DIY repair. Knowing when to call a professional prevents costly mistakes and water damage.
Call a plumber for:
- Leaks inside walls or under concrete slabs
- Leaks at the main water line
- Large cracks or splits in pipes
- Leaks that return after temporary repairs
- Corroded pipes that need replacement
- Gas line leaks (always call a professional for gas)
- Sewer line leaks
The difference between a quick fix and a costly problem often comes down to timing. Catching leaks early and knowing when to call a professional saves money and prevents structural damage.
Post-Repair Testing and Water Damage Prevention
After completing a repair, test it thoroughly before considering the job done. Proper testing catches failures early, and addressing water damage before it spreads prevents costly structural repairs.
Testing Your Repair
Verify the repair immediately:
- Turn the water back on slowly
- Watch the repair area for 15 minutes
- Check underneath and behind the repair for drips
- Feel the pipe surface with a dry cloth; it should remain dry
- Monitor the area again for 24 hours
If water still drips, the repair failed. Shut off water again and try a different method or call a professional.
Assessing Water Damage
Once the leak is stopped, inspect the surrounding area for water damage. Water inside walls, under flooring, or in crawlspaces creates conditions for mold growth and structural decay within 24-48 hours (the CDC).
Signs of water damage include:
- Soft, spongy, or buckling drywall
- Discoloration or dark staining on walls, ceilings, or subfloors
- Peeling paint or wallpaper
- Visible mold or mildew (black, green, or orange spots)
- A musty or earthy smell
- Warped or cupped hardwood flooring
- Rust stains on metal surfaces or fasteners
Drying Wet Areas
If water has been present for less than 24 hours and damage is limited to surface areas, you can dry the space yourself.
Steps to dry affected areas:
-
Remove standing water. Use towels, a wet/dry vacuum, or a mop to remove pooled water.
-
Increase air circulation. Open windows and doors to create cross-ventilation. Position fans to blow air across wet surfaces and out of the home.
-
Use a dehumidifier. Place one in the affected room and run it continuously until humidity drops below 50 percent.
-
Remove wet materials if possible. If carpet or insulation is soaked, remove it. Wet insulation loses its R-value and harbors mold.
-
Monitor humidity. Use a humidity meter to track progress. Humidity above 60 percent encourages mold growth; aim for 30-50 percent (the CDC).
-
Check for hidden moisture. If the leak was behind a wall or under flooring, drill small holes (1/8 inch) in inconspicuous areas to allow air circulation inside cavities.
When Professional Water Damage Remediation Is Necessary
If water has been present for more than 24 hours, if mold is visible, or if water has penetrated walls or subfloors, professional remediation is necessary.
Call a water damage restoration company if:
- Water has saturated drywall, insulation, or subfloors
- Mold is visible or suspected
- Water has been present for more than 24 hours
- The affected area is larger than 10 square feet
- Water came from a contaminated source (sewage, flooding)
- You cannot access or dry hidden areas (inside walls, under concrete)
Mold Prevention After Drying
Even after an area is dry, mold spores can germinate if moisture returns.
After drying is complete:
- Repair the leak permanently (do not rely on temporary patches long-term)
- Improve ventilation in damp areas (bathrooms, kitchens, crawlspaces)
- Ensure gutters and downspouts direct water away from the foundation
- Insulate cold water pipes to prevent condensation
- Use exhaust fans when showering or cooking
- Monitor humidity; keep it below 60 percent year-round
Common Mistakes to Avoid
Don’t make these mistakes:
- Ignoring small drips (they waste water and indicate bigger problems)
- Applying putty or patches to wet pipes (they won’t stick)
- Overtightening clamps or fittings (you’ll damage the pipe)
- Leaving temporary patches in place permanently (they fail over time)
- Shutting off water too aggressively (you can damage the valve)
- Skipping the post-repair test (failures show up later at worse times)
- Delaying professional help on serious leaks (water damage accelerates quickly)
The most common error is underestimating how fast water damage spreads. A leak that seems minor today can cause mold, structural rot, and foundation problems within weeks.
Frequently Asked Questions
What is the fastest way to stop a water leak?
The fastest temporary fix is to turn off your main water supply immediately, then apply epoxy putty or a rubber patch to the leak source. For faucet leaks, tightening the compression fitting or replacing the cartridge often stops the drip within minutes. However, temporary fixes are just that, temporary. Most minor water leaks require a permanent repair within 24-48 hours to prevent water damage and mold growth.
How do I know if I need to call a professional plumber for my water leak?
Call a professional plumber if the leak is behind walls, under your foundation (slab leak), in the main water line, or if it involves gas lines. Also seek professional help if you’ve attempted a repair and the leak persists, if you lack the right tools, or if the leak is large enough to cause active water damage. A licensed plumber can detect hidden leaks and provide permanent solutions with a warranty on their work.
What tools do I actually need to fix a minor water leak?
Essential plumbing tools for homeowners include an adjustable wrench, pipe wrench, pipe cutter, thread seal tape, epoxy putty, rubber patches, pipe clamps, and a bucket or drip tray. Most hardware stores sell affordable starter kits. If you don’t own these tools and only need them once, it may be more economical to call a professional.
Can I use flex seal or similar products to permanently fix a water leak?
Products like flex seal work as temporary patches for small leaks but are not permanent solutions. They may fail under water pressure or temperature changes. Epoxy putty and rubber patches with pipe clamps are more reliable for minor repairs. For any leak that persists after a temporary fix, or for leaks in critical plumbing areas, professional repair or replacement of the affected pipe section is necessary.
Fixing minor water leaks yourself is possible when you have the right tools and knowledge. But some leaks demand professional attention. DeWolfe’s Affordable Plumbing specializes in water leak detection and repair, backed by a full written warranty on all labor. Our team responds within 24 hours and provides transparent estimates before starting work. For leaks you can’t handle alone, call DeWolfe’s Affordable Plumbing at (972) 632-9935.