

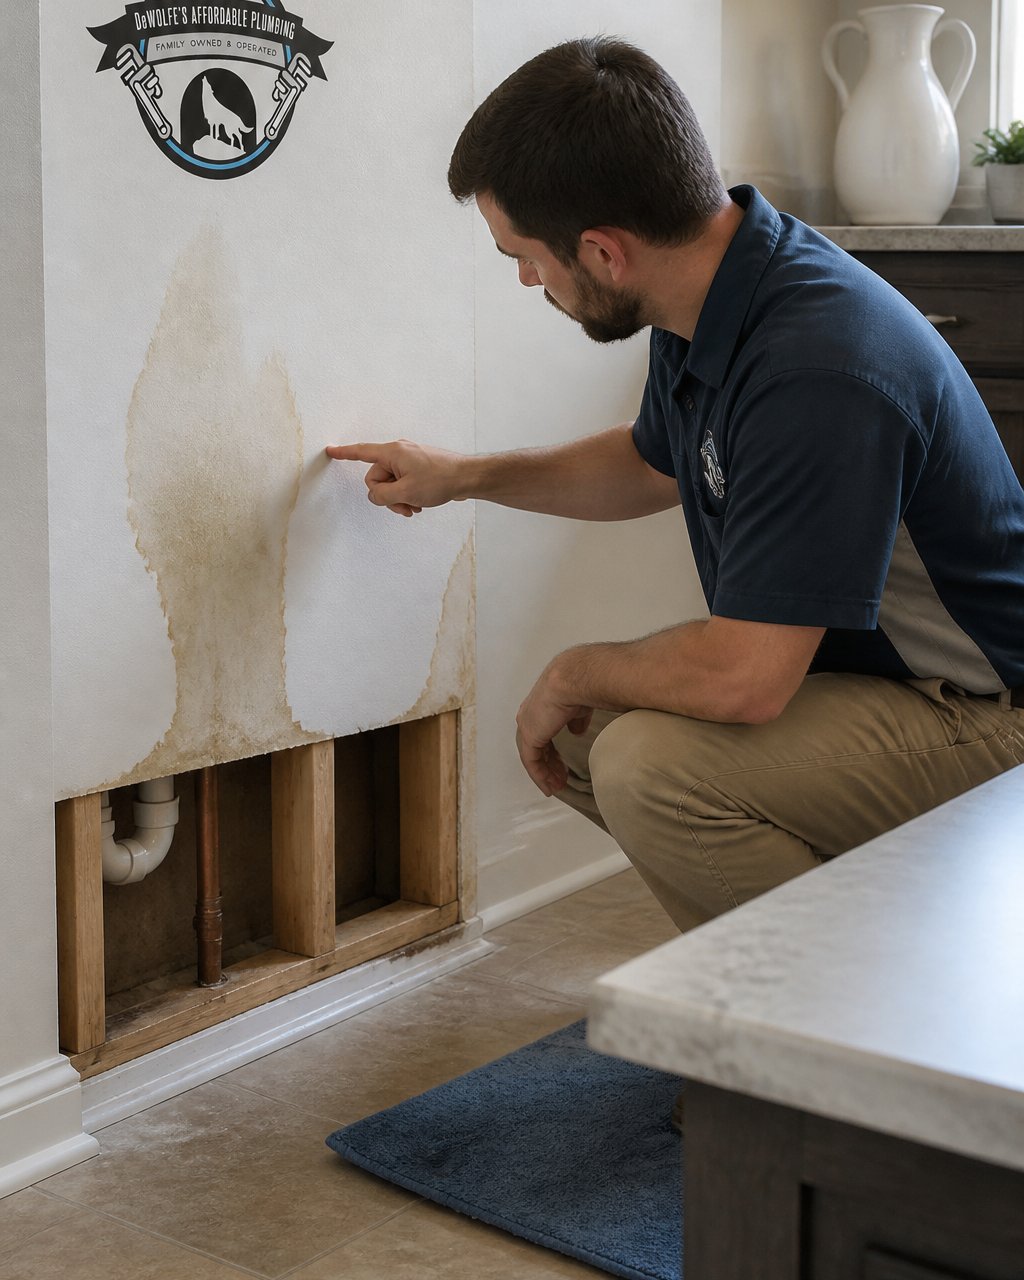
Signs of a Hidden Water Leak in Walls
Table of Contents
- Visual Signs of a Hidden Water Leak in Walls
- Physical and Sensory Indicators of Water Damage
- How to Detect a Water Leak in a Wall
- Water Leak Detection Tools and Their Limitations
- What to Do When You Find a Wall Leak
- How Long Can a Water Leak Go Unnoticed
- Unexplained Water Bill Increases
- Next Steps: Professional Leak Detection and Repair
- Frequently Asked Questions
Last Updated: October 13, 2026
Visual Signs of a Hidden Water Leak in Walls
A hidden water leak in walls is one of the most destructive problems a homeowner can face. Leaks hide behind drywall and insulation, causing damage for weeks or months before you notice.
Water damage leaves visible clues on walls, ceilings, and floors, and the sooner you find a hidden water leak in walls, the cheaper the repair.
Water stains and discoloration
Yellow, brown, or rust-colored stains on walls or ceilings are the most common sign of a hidden water leak in walls.
Check corners where walls meet ceilings, areas around windows and doors, exterior walls, and any discolored patches that appear suddenly.
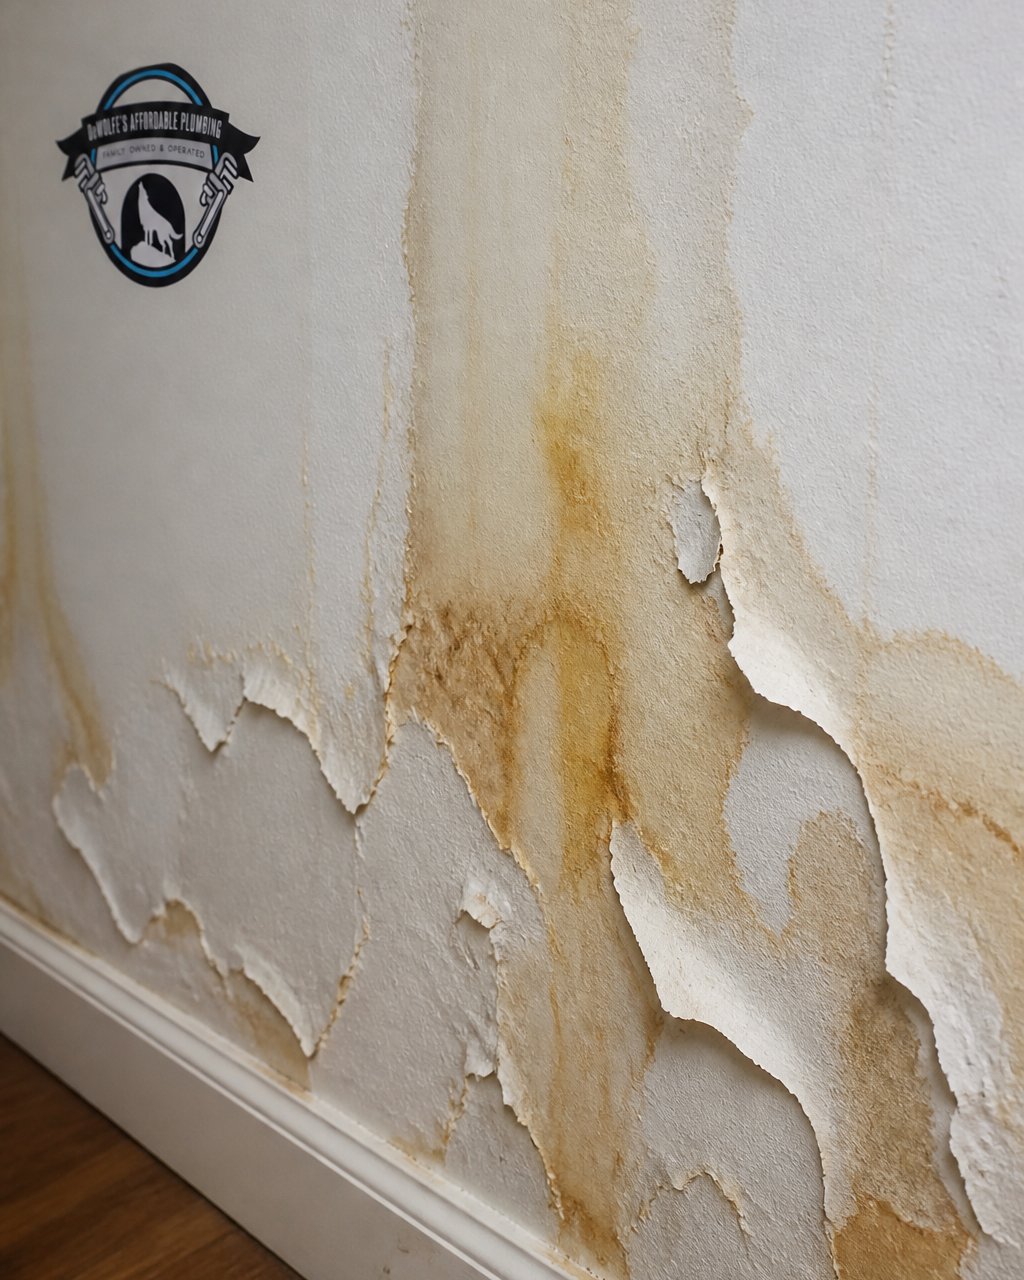
Peeling, bubbling, or blistering paint and wallpaper
When water gets trapped behind paint or wallpaper, the finish fails: paint bubbles and peels, and wallpaper lifts and separates.
Look for soft or hollow paint bubbles, curling wallpaper edges, blistering across a large area, and paint that peels in layers. Don’t just repaint, covering it up traps more moisture.
Warped, bulging, sagging, or soft wall surfaces
When drywall absorbs moisture for days or weeks, it loses strength and develops soft spots, bulges, or sagging. Press gently on suspicious areas: a healthy wall feels solid, while a water-damaged wall feels spongy. Sagging ceilings are especially serious, water has pooled above and the drywall is failing, so treat this as urgent.
Physical and Sensory Indicators of Water Damage
Beyond what you see, your senses can detect a hidden water leak in walls before visual damage appears.
Damp or wet walls and floors
Run your hand over walls and floors near suspected problem areas, a damp wall feels cool and slightly moist. Check baseboards along exterior walls, flooring near walls, corners and wall joints, and areas below bathrooms or kitchens. If a wall stays damp for more than a few hours, water is actively entering: this is a clear sign of a hidden water leak in walls that needs professional attention.
Musty and moldy odors
A musty smell is one of the earliest warning signs of hidden moisture, mold and mildew grow as soon as moisture levels rise, and you smell them before you see them. If a room smells earthy or damp, investigate: mold grows inside wall cavities long before it shows on the surface.
Mold and mildew growth
Visible mold or mildew, black, green, or white patches, grows where moisture is constant. Don’t touch it or clean it yourself, since spores spread when disturbed; professional remediation is needed and the moisture source must be found and fixed. Mold means the hidden water leak in walls has been active long enough for biological growth, so call a professional immediately.
How to Detect a Water Leak in a Wall
Spotting a sign is not the same as confirming a leak. Stains, damp patches, and musty odors can come from several sources, so work through these steps in order to tell a plumbing leak apart from lookalikes.
Step 1: Rule out the lookalikes first
Before you assume a pipe is leaking, eliminate the three most common false alarms:
- Condensation. Cold pipes sweat in humid weather, especially in basements and crawlspaces. It appears on the pipe and surfaces directly below it, and dries out when indoor humidity drops, a plumbing leak does not.
- Exterior water intrusion. Roof leaks, failed flashing, clogged gutters, and cracked caulking push water into wall cavities. These show up on exterior walls, near windows and doors, and on ceilings below the roof line, worsening after rain.
- HVAC condensate. A clogged or disconnected condensate drain line can drip continuously into a wall or ceiling cavity, most often in summer near the indoor unit or drain line route.
If the moisture tracks with weather, humidity, or cooling season, it may be one of these. If it is constant and unrelated to weather, a supply or drain line is more likely.
Step 2: Run the water meter test
This is the single most reliable confirmation step you can do yourself.
- Shut off every water-using fixture and appliance, faucets, toilets, dishwasher, washing machine, ice maker, and outdoor spigots.
- Make sure no one uses water during the test.
- Note the exact meter reading, including the low-flow indicator (the small triangle or dial that spins when even a trickle passes).
- Wait 30 to 60 minutes.
- Read the meter again.
If the reading changed or the indicator moved, water is moving through the system somewhere, confirming an active leak, but not where it is.
Take a photo of the meter at the start and end of the test. It gives you a clean before-and-after record and is useful if you file an insurance claim later.
Step 3: Isolate supply leaks from drain leaks
A meter that moves with everything off points to a pressurized supply line, which runs continuously because it is always under pressure.
A drain leak behaves differently: drain lines only carry water when something drains, so the meter may sit still. To check, watch the wall while a fixture above or nearby drains, run a sink, shower, or washing machine, and look for new dampness, a fresh stain edge, or a drip sound.
Step 4: Map the plumbing to narrow the location
Water follows the path of least resistance, so the wet spot is often not the leak. Build a list of suspects from your home’s layout:
- Bathrooms and kitchens concentrate supply and drain lines. A leak above a bathroom ceiling usually traces to the toilet, tub, shower valve, or sink supply.
- Second-floor fixtures frequently cause first-floor ceiling stains, since water travels down through the floor assembly.
- Slab-on-grade homes can hide leaks under the floor, showing up as warm spots, damp carpet, or a water bill spike with no visible wall damage.
Check the rooms above, below, and beside the damaged wall, a leak two rooms away can surface where you least expect it.
Step 5: Listen and feel
In a quiet house, an active supply leak often produces a faint hiss or steady drip inside the wall. Press a glass against the wall to amplify the sound, and run your hand along baseboards, a cool, damp band is a strong clue.
Step 6: Document before you call
Photograph every stain, damp patch, and soft spot, note the date and whether each is growing, and write down your meter readings. This helps a plumber prioritize and documents your claim.
If you see water actively running, hear water spraying inside a wall, or notice a bulge that is growing by the hour, skip the remaining steps. Shut off the main water supply and call a licensed plumber. Do not open the wall yourself near outlets, switches, or a breaker panel, water and electricity are a dangerous combination.
A confirmed leak is not a diagnosis of where it is. The steps above tell you whether you have an active leak and roughly which system it belongs to. Pinpointing the exact pipe usually takes a plumber with detection tools.
Water Leak Detection Tools and Their Limitations
No single tool finds a hidden wall leak. Each answers a different question, and a good technician uses them in sequence, starting broad and narrowing down. Knowing what each tool can and cannot prove helps you understand a diagnosis.
Moisture meters
What it does: Measures water content of drywall, wood, and other materials by electrical conductivity.
What it proves: Where moisture is present now and roughly how wet the material is; scanning in a grid maps the wet zone.
Best use: Confirming a suspicious area is genuinely wet and defining the affected zone.
Infrared (thermal) cameras
What it does: Detects surface temperature differences.
What it proves: The likely extent of hidden moisture behind a finished surface, without touching the wall.
What it cannot prove: That the moisture is from a leak.
Best use: Quickly scanning a large area to find where to focus, then confirming with a moisture meter.
Acoustic leak detection
What it does: Uses a sensitive microphone to pick up the sound of water escaping a pressurized pipe.
What it cannot prove: Anything about a drain leak or slow seep, which make little or no sound.
Best use: Pinpointing a supply-side leak after the meter test confirms one exists.
Other tools a technician may use
- Tracer gas detection: A harmless gas is introduced into a drained pipe, and a sensor locates where it escapes. Useful for hard-to-reach drain lines.
- Pressure testing: Isolating a section of pipe and pressurizing it to confirm whether that section holds. This can confirm a leak in a specific run but does not locate it precisely.
- Video inspection: A camera snake pushed through a drain line can reveal cracks, joint failures, and root intrusion from the inside.
How the tools work together
A typical sequence:
- Meter test to confirm an active leak.
- Thermal scan to map the general wet zone.
- Moisture meter to confirm and define the wet area.
- Acoustic or tracer gas detection to narrow down the pipe.
- Pressure testing or video inspection to confirm the failure point before opening the wall.
The value of detection tools is not that any one of them finds the leak. It is that together they let a plumber open the smallest possible section of wall in the right place, saving you patching, painting, and disruption.
What to ask before you approve work
- Which tools were used, and what did each one show?
- Is the leak on the supply side or the drain side?
- How much wall will need to be opened, and where?
A technician who answers these clearly is building a case, not guessing. If the answer is “we’ll open the wall and find out,” ask whether detection tools can narrow the location first, it usually saves time and repair cost.
What to Do When You Find a Wall Leak
Finding a hidden water leak in walls is stressful, but immediate action prevents catastrophic damage.
First, locate the main water shutoff valve, usually in the basement, crawlspace, or near the foundation.
Second, document everything with photos of stains, wet areas, and damage to help your plumber and any insurance claim.
Third, call a professional. For homes with slab foundations, Slab Leak Location and Repair may be necessary if the leak runs beneath the concrete.
Do not attempt DIY repairs.
How Long Can a Water Leak Go Unnoticed
A hidden water leak in walls can persist for weeks or months before serious damage becomes obvious, depending on the leak size and location.
The danger is compound damage: water seeps into insulation, reducing its effectiveness, wicks into wooden framing causing rot, and creates the perfect environment for mold and mildew.
Unexplained Water Bill Increases
A water bill that jumps without explanation, and without changed habits, is often the first sign of a hidden water leak in walls.
To confirm, turn off all water and check the meter again. If it keeps moving, water is leaking somewhere, a wall leak, a slab leak, or underground supply lines.
Next Steps: Professional Leak Detection and Repair
Once you suspect a hidden water leak in walls, professional assessment is essential.
At DeWolfe’s Affordable Plumbing, we provide on-site estimates for residential customers.
We handle water leak detection and repair with a full written warranty on all labor performed.
If you suspect a hidden water leak in walls, don’t wait, water damage accelerates quickly.
Frequently Asked Questions
What are the first signs of a hidden water leak in a wall?
Early warning signs include water stains (yellow or brown patches), peeling or bubbling paint, soft or warped drywall, and musty odors. You may also notice damp spots on walls or floors, or mold and mildew growth. Many homeowners discover hidden water leaks only when they spot these visible indicators or experience unexplained increases in their water bills. The sooner you notice these signs, the faster you can prevent structural damage and mold growth.
How do I find a water leak that is not visible?
Start with a visual inspection of walls, ceilings, and floors for moisture, stains, or soft spots. Use a moisture meter to detect hidden dampness behind walls. Listen for running water sounds when all fixtures are off. Check your water meter to confirm active water usage. If these methods don’t reveal the leak’s location, professional leak detection tools like acoustic sensors and infrared cameras can pinpoint hidden leaks without damaging your walls. A licensed plumber can help locate the source quickly.
How long can a water leak go unnoticed?
Small, slow leaks can go unnoticed for weeks or months, especially if they’re behind walls where you can’t see them. However, even a slow leak causes continuous water damage, structural weakening, and mold growth. The longer a leak persists, the more expensive repairs become. Structural damage and mold remediation can cost significantly more than fixing the original leak. Early detection through regular inspections and attention to warning signs is critical to minimize damage and expense.
When should you call a plumber for a leak inside a wall?
Call a professional plumber as soon as you notice signs of a hidden water leak, such as stains, soft drywall, or musty smells. Don’t wait for the problem to worsen. A licensed plumber can confirm the leak location, assess the damage, and recommend repair options. For emergencies like active water intrusion or burst pipes, contact a plumber immediately. Professional water leak detection and prompt repair prevent costly structural damage, mold growth, and further deterioration of your home.